Backcountry Skiing and Splitboarding in Whistler: A Guided Introduction
Can you try backcountry skiing or splitboarding in Whistler without experience?
Yes, through a guided introduction day designed for people who ski or ride confidently on groomed terrain but have never toured or split-boarded outside a resort boundary. A certified guide supplies avalanche safety gear, teaches the basics of skinning and beacon use, and picks terrain that matches the group. Going outside Whistler Blackcomb's boundary without a guide or training is not a beginner activity.
Beyond the Blackcomb Ropes: What a First Backcountry Day Looks Like
Whistler Blackcomb is enormous — more than 8,000 acres of skiable terrain across three glaciers, the biggest ski area in North America. It is easy to look at a map of Blackcomb Mountain and Whistler Mountain and assume the untracked bowls just past the boundary rope are simply more of the same resort, reachable by anyone who can already handle a black-diamond groomer. They are not. The moment you duck a rope or hike past a boundary gate at Whistler Blackcomb, you leave avalanche-controlled terrain and enter a wild, forecast-only snowpack. That distinction is the entire subject of this guide.
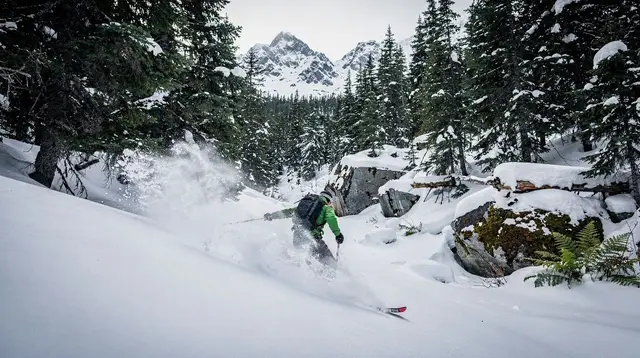
The good news is that curiosity about backcountry skiing and splitboarding does not require years of apprenticeship before you try it. A guided introduction day exists precisely to let a strong resort skier or rider take a first supervised look at ski touring — climbing on skins, reading terrain, and descending on natural, ungroomed snow — without having to already own the skills or the judgment that backcountry travel normally takes years to build. What it does not do, and should never be sold as doing, is remove the avalanche risk. It manages it, with a guide.
Why This Is Never a Solo Beginner Activity
The Sea to Sky corridor’s snowpack is a maritime one: heavy, wet, fast-loading snow that can bond well one week and fail catastrophically the next after a warm spell, a wind event, or a big new storm load. The terrain around Whistler and Blackcomb mountains — the same alpine bowls, glacial approaches and steep tree runs that make the resort famous — is serious avalanche country the instant you step outside the controlled boundary. Slopes that look like an easy hike from the gondola can be exactly the pitch and aspect that produces a slab avalanche.
This is not a scare tactic; it is the operating assumption of every professional guide in this valley. A worthwhile introduction to backcountry skiing or splitboarding always comes bundled with three things a first-timer does not yet have: a transceiver, probe and shovel and the training to use them fast under pressure; a daily read of the regional avalanche bulletin and how it applies to the specific slope in front of the group; and the judgment, built over years, to turn around when conditions say no. None of that is optional add-on safety.
It is the product. If you take away nothing else from this page, take this: backcountry terrain around Whistler Blackcomb is not a self-guided beginner activity, at any time of year. a guided introduction to backcountry skiing and splitboarding is built around that reality. Small groups, a certified guide, rental touring gear where needed, and terrain chosen for the day’s actual avalanche conditions rather than a fixed itinerary printed months in advance.
What Actually Happens on a Beginner Day
A typical introduction day starts low-key: a gear check and a briefing on how skins, touring bindings (or a splitboard’s climbing setup) and avalanche transceivers work, usually somewhere near the Whistler Village base or a trailhead reached by snowmobile or snowcat. Guides use this window to size up the group’s actual ski or ride level — this is not the moment to overstate your ability, since it changes what terrain is safe to use later.
The climb, or “skin track,” follows a gentle, guide-chosen line, often through forest below treeline where visibility and avalanche exposure are both more forgiving than the open alpine. Pace is conversational rather than a race; groups stop to practice transceiver searches, talk about what the guide is reading in the snowpack, and sometimes dig a small pit to look at the layers underfoot. Only once the group is comfortable does the day turn toward a descent, on snow that has not been groomed, tracked out, or avalanche-controlled the way a resort run has been.
That descent is the payoff and also the part beginners most underestimate: ungroomed snow — heavy, variable, sometimes wind-affected — skis and rides differently from a corduroy resort run, even at a gentle pitch. Guides pick terrain that matches the group’s actual turns, not their resort bravado, which is why an honest self-assessment before booking matters more here than on almost any other Whistler activity.
Backcountry Skiing vs. Resort Skiing vs. Nordic Skiing: Not the Same Sport
Whistler’s marketing sometimes blurs “ski” activities together, but the three are genuinely different days out, and this guide covers only the middle one.
| Activity | Where | Terrain | Avalanche risk | Where to read more |
|---|---|---|---|---|
| Alpine (resort) skiing | Inside the Whistler Blackcomb boundary | Groomed and avalanche-controlled runs | Essentially none inside the boundary | Whistler Blackcomb terrain guide |
| Backcountry skiing / splitboarding | Outside the Whistler Blackcomb boundary, alpine and treed terrain | Ungroomed, natural snowpack | Real, managed only by a guide’s daily judgment | This page |
| Nordic (cross-country) skiing | Whistler Olympic Park, Callaghan Valley | Groomed, track-set, rolling trails | Essentially none | Nordic skiing at Whistler Olympic Park |
If what you actually want is a day of classic or skate skiing on flat, groomed tracks at the former 2010 Olympic Nordic venue, that is a completely different activity from everything described on this page — see the dedicated Whistler Olympic Park Nordic skiing guide instead.
Likewise, if the plan is simply to ski or ride the marked runs of Whistler Mountain and Blackcomb Mountain, you want resort lift tickets, not a backcountry tour — start with when Whistler Blackcomb’s season opens and the Epic Pass and lift ticket pricing guide.
Who a Beginner Backcountry Day Suits — and Who It Doesn’t
This activity rewards a specific kind of skier or rider: someone who is already comfortable and confident on black-diamond groomed runs at a resort, curious about what lies beyond the boundary ropes, but who has never toured, split-boarded, or traveled in avalanche terrain before. If that describes you, a guided introduction is exactly the lower-risk way to find out whether backcountry travel is something you want to pursue further — with proper avalanche training courses — in future seasons.
It is a poor fit for two different groups. First, complete beginners to skiing or snowboarding: you need to already handle groomed intermediate-to-advanced terrain confidently before adding ungroomed snow, uphill travel and altitude into the mix. Second, anyone hoping for a low-effort scenic outing: the climb is real physical work, typically one to three hours of steady uphill skinning, and the day is built around skiing ability and endurance, not sightseeing.
If a scenic, lower-effort alpine experience is really the goal, a helicopter flight over Blackcomb’s glaciers or a groomed evening snowshoeing or skiing outing at Whistler Olympic Park will suit the day better than a backcountry tour.
Gear: What’s Provided and What to Bring
Reputable introduction tours provide the specialized safety and touring equipment that a visitor is very unlikely to already own: touring skis with skins and touring bindings, or a rental splitboard set up to split for the climb, plus an avalanche transceiver, probe and shovel, and instruction in using all three.
What guests typically bring themselves is closer to a standard resort day, adjusted for physical effort: warm, moisture-wicking base layers, a waterproof and breathable outer shell (you will sweat on the climb and need to shed heat, then cool down fast on the descent), gloves, goggles or sunglasses, sunscreen, and a small daypack for water and snacks. Exact inclusions vary by operator and season, so always check the specific tour listing before assuming what is supplied.
Dressing for a backcountry day is genuinely different from dressing for lift-served skiing, since you generate real heat on the way up and lose it fast once you stop moving. Layering that can be added and removed easily on the go matters more here than on any groomed-run day — see the general Whistler winter packing guide for the baseline, then plan to carry more layers than you would for lift skiing alone.
Season and Conditions
Backcountry skiing and splitboarding around Whistler generally follow the same broad season as the Whistler Blackcomb lifts — late November into spring — with January through March typically offering the most consistently stable, deep snowpack for guided introduction days. Exact opening dates, closing dates and which weeks have the best conditions shift every year with the weather, so treat any specific date as approximate; the Whistler Blackcomb season opening guide covers how that timing is set.
What does not shift is the need for a guide’s daily judgment: the same slope can be safe on Monday and dangerous by Thursday after a storm, which is a call that belongs to a certified professional reading that morning’s avalanche bulletin, not to a guidebook or a booking calendar.
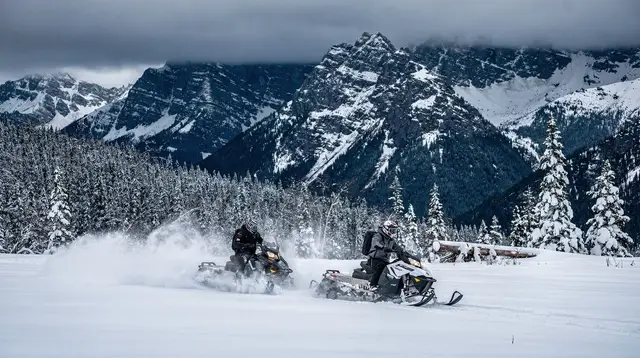
If you would rather explore beyond the lifts by a different, non-ski means while still seeing serious backcountry terrain, a guided backcountry snowmobile trip into the alpine covers similar terrain with a motor doing the climbing instead of your legs — a useful alternative on a day when the ski touring group is full, or when a member of your party does not ski or ride at all.
Planning Around the Rest of a Whistler Winter Trip
A backcountry introduction day is physically demanding, so most visitors pair it with lighter activities on the days around it rather than back-to-back big efforts. A half-day return to the groomed runs on Whistler Mountain or Blackcomb, an evening at Scandinave Spa, or a scenic, low-effort outing works well as a contrast; the winter without skiing itinerary has ideas for pacing a mixed-activity trip.
For the broader question of when to visit for winter conditions in general, see the best time to visit Whistler guide, and for driving in on the Sea to Sky Highway in winter tyres-and-conditions territory, Highway 99 driving conditions is worth reading before you arrive. The full roster of winter activity options, from resort skiing to snowmobiling, sits on the skiing and snowboarding category page and the Whistler activities hub.
Whistler Backcountry Skiing and Splitboarding: Common Questions
Do I need previous backcountry experience to join a beginner tour?
No. Introduction tours are built for confident intermediate skiers and riders who have never left groomed terrain. You do need to be a solid parallel skier or linked-turn snowboarder on blue and black runs, since backcountry snow is unpredictable and there is no groomer underneath you.
Is backcountry skiing near Whistler Blackcomb dangerous?
The terrain around Whistler and Blackcomb mountains sits in serious avalanche country, with the same coastal snowpack that produces some of the deepest snowfall in North America. Slopes that look gentle can slide. That risk is exactly why guided introductions exist: a certified guide reads the day’s avalanche bulletin, chooses terrain accordingly, and carries the training and rescue gear that a first-timer does not yet have.
What is the difference between backcountry skiing and the Nordic skiing at Whistler Olympic Park?
Backcountry skiing and splitboarding involve climbing on skins into ungroomed alpine or forest terrain outside the resort boundary, then descending on natural snow, with avalanche exposure. Nordic (cross-country) skiing at Whistler Olympic Park in the Callaghan Valley uses groomed, track-set trails on rolling terrain with essentially no avalanche risk. They use overlapping equipment vocabulary but are different sports for different days.
What gear does a beginner backcountry tour provide?
A typical introduction includes touring skis or a splitboard with skins, avalanche transceiver, probe and shovel, and instruction in how to use all of it. Guests usually bring their own warm layers, waterproof outerwear, gloves and a daypack; check the specific tour’s inclusion list before booking, since equipment lists vary by operator.
How fit do I need to be for a beginner backcountry ski day?
Enough to skin uphill at a steady pace for one to three hours before the descent, since backcountry travel is powered by your own legs rather than a chairlift. Guides set the pace to the group and beginner days generally choose shorter, gentler tours than a fitness-focused itinerary, but this is not a sit-back activity.
When is the backcountry skiing and splitboarding season around Whistler?
Roughly the same window as the Whistler Blackcomb lift season, from late November into spring, with the most stable and popular conditions typically from January through March. Snowpack and avalanche conditions change through the season and by year, which is another reason a guide’s daily judgment matters more than a calendar date.
Can a splitboarder and a backcountry skier go on the same tour?
Yes. Splitboards separate into two skis for the climb and reassemble into a snowboard for the descent, so splitboarders skin alongside backcountry skiers at a similar pace. Mixed groups of skiers and splitboarders on the same guided day are normal.
Skiing & Snowboarding on GetYourGuide
Verified deep-linked GetYourGuide tours. Book through these links and we earn a small commission at no cost to you.
GetYourGuide does not provide a product photo for this activity — the image shows the meeting point, photographed by us.