What to Pack for Whistler in Winter
What should I pack for a winter trip to Whistler?
Pack a proper layering system, a waterproof insulated jacket and pants, and grippy waterproof boots, since the mountains average around 11 m of snow a year and December to March is the coldest and busiest stretch. If you are driving up, add winter driving essentials, because winter tires or chains are legally required on Highway 99 from 1 October to 30 April.
Why Whistler winters demand a real packing list
Whistler is not a place where a warm coat and a spare sweater will see you through. The mountains around Whistler Village average on the order of 11 m of snowfall a year, and the deep-winter stretch from December through March is both the coldest and by far the busiest season, when the valley fills with skiers, families, and holiday crowds. That combination, heavy and reliable snow plus a village built for walking, means the right gear is not a comfort upgrade, it is what decides whether your week feels magical or miserable.
This guide is deliberately narrow. It does not cover which winter activities to book, that is a separate decision covered in the things to do in Whistler categories. What it covers is the practical question travellers ask right before they zip a suitcase closed: what actually needs to go in the bag, and in the car, for a winter trip to this specific resort in British Columbia.
The layering system that actually works here
Whistler’s winter climate is coastal, not continental. That means it is rarely the kind of dry, brutal cold you get inland, it is a wetter, heavier cold, with snow that sticks to everything and temperatures that hover around and just below freezing for weeks at a time. The layering system that works is built for damp, not dry, cold:
- Base layer: merino wool or synthetic long underwear, top and bottom. Skip cotton entirely, it holds moisture against your skin and stays cold and clammy once damp.
- Mid layer: a fleece or lightweight down sweater for insulation you can add or remove as your activity level changes.
- Outer layer: a genuinely waterproof, insulated shell, not a fashion jacket with a water-resistant coating. This is the layer that matters most, and it is covered on its own below.
Pack two or three base layers and one mid layer for a week-long trip, since you will wear the same outer shell most days but want dry layers underneath after a day in the snow. Bring a change of clothes you can leave at the hotel for evenings in Whistler Village, the resort’s restaurant and après-ski scene is casual, but arriving in snow-soaked layers gets old fast.
Outerwear: the jacket and pants worth paying for
If you buy one thing for this trip, make it a proper insulated, waterproof winter jacket rated for snow sports, not everyday urban cold. Whistler’s snow is wet by ski-resort standards, and a jacket rated only for dry cold or light rain will soak through during a day outdoors. Look for a jacket with taped seams, a genuine waterproof rating, and enough room to layer a fleece underneath.
Insulated, waterproof snow pants matter just as much as the jacket, even if you are not skiing. Anyone planning a guided wilderness hike through the snow, a snowmobile outing, or simply a long day walking around Lost Lake or the Train Wreck Trail will be sitting or kneeling in snow at some point, and regular trousers will not keep it out. If you would rather not pack a bulky pair, most winter tour operators, including ATV and side-by-side outfitters, provide insulated coveralls as part of the experience, which is worth confirming when you book.
Do not forget a warm hat that covers your ears, and a neck gaiter or scarf. Wind chill on the mountain and around the PEAK 2 PEAK Gondola stations can make a merely cold day feel far colder, and exposed ears and necks are usually the first thing people regret leaving at home.
Footwear: boots for the village, boots for the snow
Whistler footwear splits into two jobs, and one pair rarely does both well.
Village and walking boots need a deep, aggressive tread and a fully waterproof shell, since the Village Stroll and surrounding paths are cleared of loose snow but stay packed with ice for months. A boot rated only “water-resistant” will let moisture in within an hour of slush and standing water at building entrances. Add ice grippers or traction cleats that slip over your boot soles if you plan on much walking, they are inexpensive, pack flat, and turn an icy sidewalk from a hazard into a non-issue.
Snow boots for deeper activity, hiking in snow, snowshoeing, or a day around Whistler Olympic Park in the Callaghan Valley, should be insulated well past what village boots need, since you will be standing in snow rather than walking over cleared pavement. If you are skiing or riding, your ski boots are their own category and are almost always rented at the resort rather than packed from home.
Bring at least two pairs of wool or synthetic socks per day if you expect wet conditions, damp socks are one of the fastest ways a good day turns unpleasant, and they take a while to dry in hotel rooms.
Accessories that matter more than people expect
A short list of small items causes a disproportionate amount of winter-trip regret when left at home:
- Waterproof gloves or mittens, ideally with a liner glove underneath for dexterity when you need bare-ish fingers for a phone or a zipper. Ski gloves are warmer than everyday winter gloves and worth the extra bulk.
- Sunglasses or ski goggles. Snow glare is intense on clear days, and it is easy to forget that a bright, sunny, freezing day at altitude burns eyes and skin faster than a cloudy one at sea level.
- Sunscreen and lip balm. The same glare that requires sunglasses also causes sunburn on exposed skin, even in the cold, and altitude increases UV exposure.
- A lightweight daypack, waterproof or with a rain cover, for carrying extra layers, water, and snacks on longer outings such as a day exploring the Sea to Sky Highway or a half-day snowshoe.
- A portable phone charger. Cold weather drains phone batteries noticeably faster, and you will likely be taking more photos than usual around the PEAK 2 PEAK Gondola and the peaks either side of it.
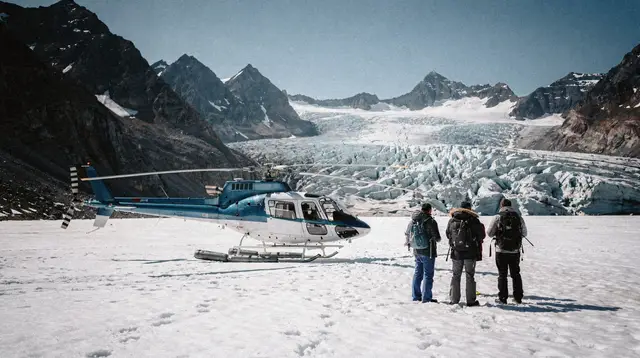
If your trip includes something like a helicopter tour over the Blackcomb glaciers or an evening walk through Vallea Lumina, dress as though you will be standing still outdoors for twenty minutes longer than planned, moving activities keep you warm, waiting around for a shuttle or a group photo does not.
Driving Highway 99 in winter: what to pack in the car
Anyone driving up from Vancouver or Vancouver International Airport (YVR) needs to plan for winter driving conditions, not just winter clothing. Winter tires or chains are a legal requirement on Highway 99, the Sea to Sky Highway, from 1 October through 30 April, and this is enforced, not a suggestion. Rental cars picked up during that window should come fitted with winter tires as standard, but confirm it at the counter rather than assuming, and ask what to do if you are given all-season tires instead.
Beyond tires, pack or pre-arrange:
- An ice scraper and snow brush if you are driving your own or a borrowed vehicle rather than a fresh rental.
- A basic emergency kit, a blanket, a flashlight, some water and snacks, in case of a road closure. Highway 99 closes several times most winters for avalanche control, snowfall, or collisions, and there is no practical alternate route, so delays of an hour or more are a real possibility, not a remote one.
- Warm clothing kept in the car, not just in your suitcase, in case you are stopped at a checkpoint or closure for a while before reaching the resort.
If the idea of driving Highway 99 in a snowstorm does not appeal, scheduled coach transfers from YVR and downtown Vancouver run year-round and remove the tire and driving-conditions question entirely, worth weighing against the flexibility of a rental car for the rest of your trip.
What you can rent or buy once you arrive
Whistler Village is well set up for travellers who would rather not check a bag full of winter gear. Multiple shops along the Village Stroll rent skis, snowboards, boots, helmets, and increasingly full outerwear kits, jackets, pants, and even base layers, by the day or for the length of a trip. This is often the better call for visitors from warmer climates who do not want to own ski-specific gear they will use once, and it also means one less thing to fit in a suitcase for the flight home.
What is harder to rent, and worth packing regardless, are the small personal items: your own well-fitted gloves, a hat you trust, and boots broken in enough that a full day of walking does not leave you with blisters. Rental boots and gloves solve the bulk problem, they do not solve the fit problem.
Packing checklist by category
| Category | What to pack | Notes |
|---|---|---|
| Base layers | 2 to 3 sets, merino wool or synthetic | Avoid cotton, it stays wet and cold |
| Mid layer | Fleece or light down sweater | Add or remove as activity level changes |
| Outer shell | Waterproof, insulated jacket and pants | The single most important item on this list |
| Footwear | Waterproof snow boots, plus ice grippers | Village ice is a real hazard, not a novelty |
| Accessories | Warm hat, gloves, neck gaiter, sunglasses | Wind chill and glare are both underestimated |
| Driving gear | Winter tires or chains, ice scraper, emergency kit | Legally required on Highway 99, 1 October to 30 April |
| Extras | Reusable water bottle, portable charger, sunscreen | Cold drains batteries faster than you expect |
Packing by trip length
A short two- or three-day trip and a full week ask for slightly different priorities. For a short trip, prioritise one excellent outer shell and boots over a large wardrobe, you can rewear the same base layers under a fresh top layer more easily than you can improvise gear you forgot. For a longer stay, especially one covering both Whistler Mountain and Blackcomb Mountain and a day trip out to Squamish or the Sea to Sky Gondola, pack enough base layers and socks to avoid doing laundry mid-trip, and bring a slightly wider range of accessories since you are more likely to hit a genuine cold snap somewhere in a longer window.
Travellers planning a mix of gentle sightseeing and a livelier outing, say a relaxed morning followed by something like a winter sightseeing tour around the resort or a night out to see Vallea Lumina’s illuminated forest walk, should still dress for the more demanding half of the day. It is far easier to unzip a vent or shed a layer than to warm up once you are already cold.
A note on money while you pack
Whistler prices, gear included, are in Canadian dollars, not euros or US dollars, and displayed prices exclude tax, with 5 percent GST plus 8 percent PST and a 3 percent municipal and regional district tax added on accommodation at checkout. If you are budgeting for rentals or a last-minute glove purchase in the village, build that tax difference in rather than assuming the price tag is the final number. For a fuller sense of what a winter trip costs beyond gear, see how much a Whistler ski trip typically costs and whether Whistler is as expensive as its reputation suggests.
When your gear matters most
Packing well matters most during the December to March deep-winter window, when snow is heaviest, crowds are largest, and the weather is least forgiving of a forgotten hat or a leaky boot. Shoulder-season visitors in November or April to May face milder, more variable conditions and can pack slightly lighter, though a waterproof shell is still worth having; see when Whistler Blackcomb’s ski season typically opens and closes and the best time to visit Whistler for how the calendar affects what you will actually need.
If your visit will include time on the snow beyond sightseeing, whether that is a guided winter hike into the backcountry or a broader look at when Whistler’s lifts open and close each season, layer for the coldest hour of your day, not the average one.
For travellers weighing whether to spend the whole trip on snow at all, Whistler works well in winter without skiing too, and a well-packed bag matters just as much for a week of walking, gondola rides, and spa time as it does for a week on the slopes. A short small-group winter sightseeing tour of the resort is a comfortable, low-effort way to see the valley properly on a day when your legs, or the weather, call for something gentler than a hike.
Common questions about packing for Whistler in winter
Do I need snow boots, or will regular hiking boots work?
You need boots rated for snow and ice, with a deep tread and a waterproof shell, not just water-resistant hiking boots. The Village Stroll gets packed snow and ice underfoot for months, and a boot that is fine for a damp autumn trail will let water in and slip on ice here.
How cold does it actually get in Whistler in winter?
Valley temperatures through the December to March deep-winter season typically sit a little below freezing, with cold snaps well into negative double digits and wind chill making the mountain feel colder still. It rarely gets as brutally cold as inland Canada, but it is consistently cold, wet, and snowy rather than dry.
Are winter tires on Highway 99 actually required, or just recommended?
They are a legal requirement, not a suggestion: winter tires or chains are mandatory on Highway 99 between Vancouver and Whistler from 1 October to 30 April. Rental cars picked up in this window should already be fitted with them, but it is worth confirming at the counter before you drive.
Can I rent winter gear in Whistler instead of packing it?
Yes. Whistler Village has multiple shops renting ski and snowboard outerwear, boots, and even parkas and snow pants by the day, which is often lighter and cheaper than buying gear you will rarely use at home. It does mean an extra stop and a fitting session on arrival, so build in time on your first day.
What should I wear in Whistler Village if I am not skiing?
The same layering logic applies even without skis: an insulated waterproof jacket, warm layers underneath, snow boots, and a hat and gloves, because the Village Stroll and outdoor patios are cold and often snowy or slushy underfoot. Village sidewalks are cleared but stay icy in patches through deep winter.
Do I need a heavy parka for a short trip, or will a lighter jacket do?
For anything from December to March, bring a genuinely insulated, waterproof jacket rather than a light shell, even for a short stay, since the cold and wet are constant rather than occasional. A packable synthetic-fill or down jacket layered under a shell is a common compromise for people who do not own a dedicated ski parka.
What is the single biggest packing mistake first-time winter visitors make?
Underestimating how wet Whistler winters are: cotton clothing, non-waterproof boots, and light gloves get soaked within an hour outdoors and stay damp all day. The fix is simple, waterproof outer layers and synthetic or wool base layers, not more layers of the wrong fabric.
Trip-planning essentials on GetYourGuide
Verified deep-linked GetYourGuide tours. Book through these links and we earn a small commission at no cost to you.
GetYourGuide does not provide a product photo for this activity — the image shows the meeting point, photographed by us.